 "Chan - Mid-engine with cabin fever" (superchan7)
06/08/2019 at 21:10 • Filed to: Jaguar, Jaguar XJ, X351, Jaguar XJL, DIY, DIYBumper, Grilles, Bumper, Bumper removal
 1
1
 2
2|
"Chan - Mid-engine with cabin fever" (superchan7)
06/08/2019 at 21:10 • Filed to: Jaguar, Jaguar XJ, X351, Jaguar XJL, DIY, DIYBumper, Grilles, Bumper, Bumper removal | 1
| 2 |
Check out the cigs my XJ spills
My hands are dirty and I don’t want to go into the office to get rid of my cig. I’ll just leave it in this customer’s car
So the de-desertification of Meow continues. This is really a tutorial and instruction article on how to remove the front bumper 1) for my own future reference, and 2) because nobody has really documented doing this on an X351 XJ—plenty of tutorials on the XF, though.
The chrome grille surround on my car was pockmarked from its previous life, so I bought a new one (it looks aftermarket, from the lack of OEM markings on the back) and installed it last night—to be accurate, this morning because it took me nearly six hours.
Here goes:
With the bonnet open, remove about 8-10 bolts (8mm) from the top of the bumper.
Let’s assume you don’t want to take the wheels off (it’s much less frustrating to do this with wheels off). Steer the front wheels all the way to one side. Let’s say right side first.
In the right wheel well, remove the five bolts (8mm) from the forward side of the plastic wheel well liner.
The fender liner should now be flexible enough to pull back. Next are two tricky screws that are difficult to locate with the wheels on the car, so I’ve marked them here to help you feel your way to them and get a sense of their directions. I think they were something like 7/32 Torx. The one that screws facing outward of the car is the worst because the fender liner and the tire are in the way, giving very little room for a forearm, a hand and a screwdriver. Again, not a problem if the wheels are off. I wasted more than half an hour looking for this last screw (x2 sides) wondering why the bumper wouldn’t come off, and most of that was getting leverage on an irrelevant screw.

5. Turn the wheels all the way left and repeat this for the left-front wheel well.
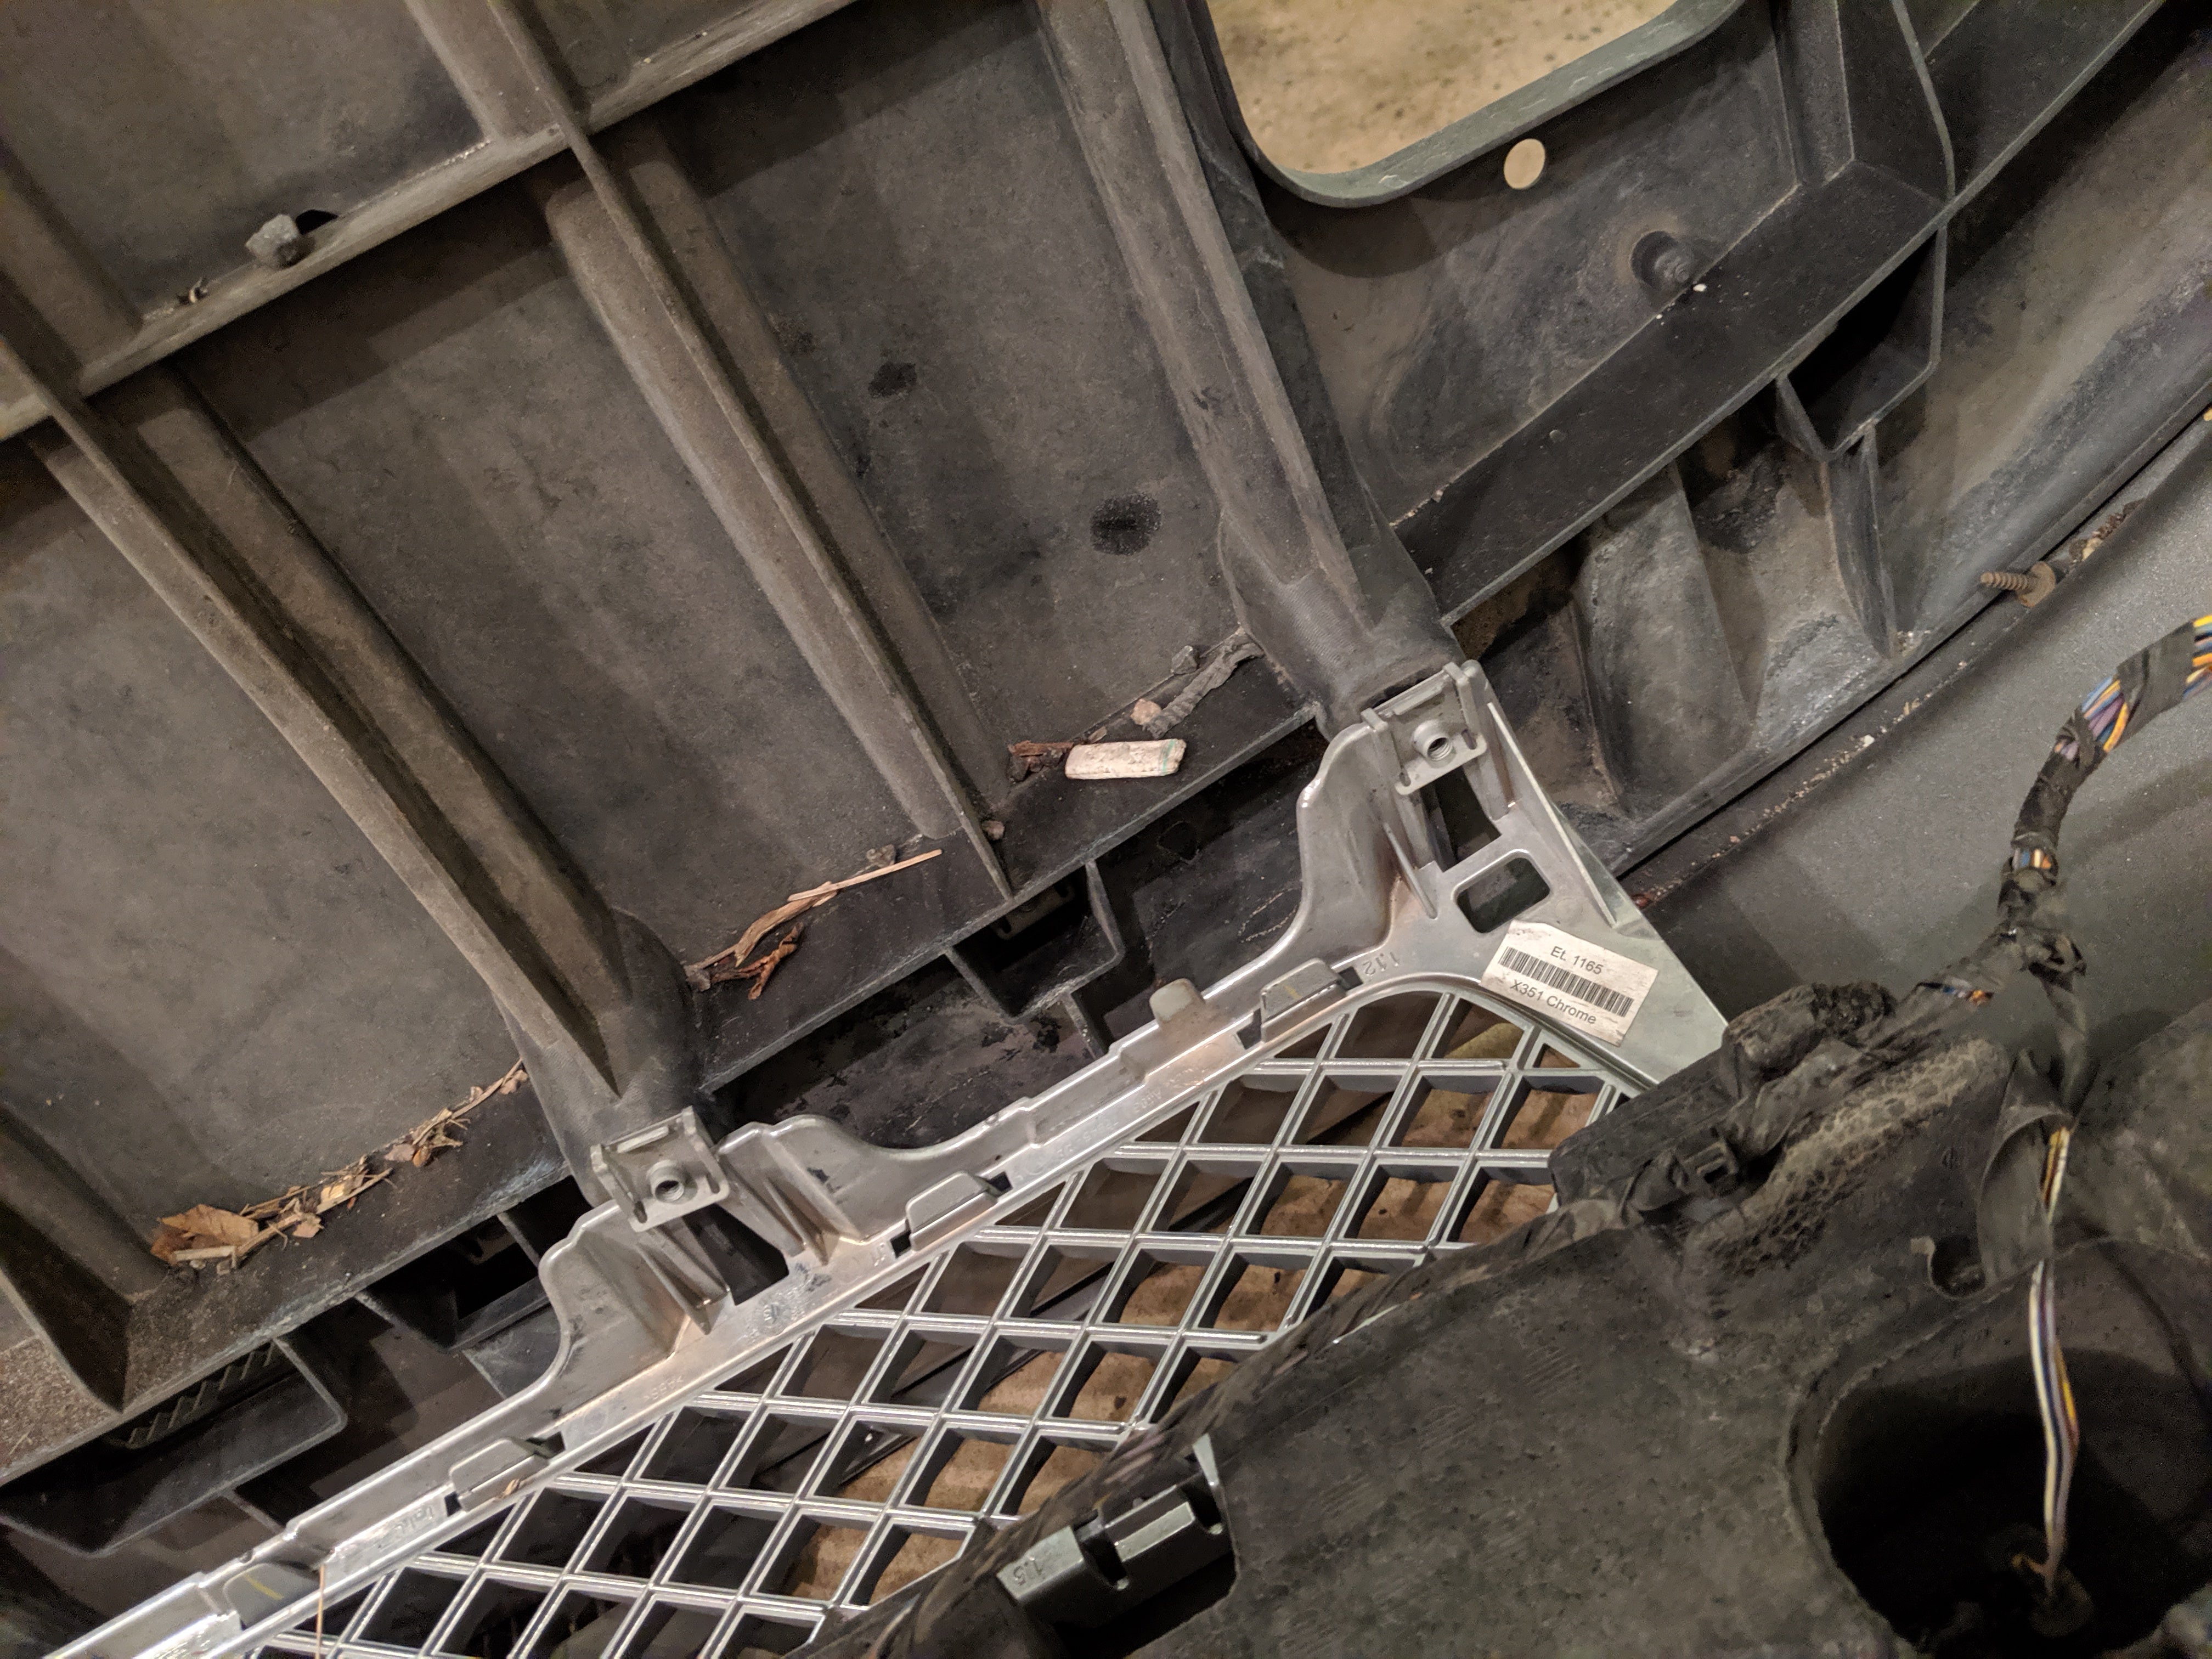
6. Next is another tricky group of bolts and screws. As with the XF, the trick is not to undo the screws right up front at the lip bottom. Go further back and remove the screws at the aft end of the front undertray. The tray will come off with the bumper. The trick is there are actually five, up from the XF’s two. Three 8mm allen bolts and two Torx screws. Some of them are tucked behind airflow barriers or up in wells so you’ll get your fix of hand-feeling for them. Be sure to remember that the allen bolts come from an area forward of the two Torx screws, as marked here:

Two allen bolts are located just a tiny bit aft of three Torx screws. I actually wasn’t sure if this trick was for the XF only, so I wasted a fair bit of time removing the 12 under-lip bolts which was not necessary. Just remove the five marked here.
7. And now you can begin to pull the bumper off. I say “begin” because there are two things to disconnect: First, go to the left wheel well and disconnect the parking sensor wiring harness. This has the least slack. Expect to wrangle with this as it’s probably caked with dust and the fender liner is still in your way. At least the pinch tab faces the wide open space for you to pinch.
8. Then go to the right wheel well and disconnect the headlamp washer fluid supply line—it should be right in front of you resting against the fender liner. Detaching it is difficult at first, so keep gently wiggling it until it gradually comes off (it’s much easier to reattach due to the anti-slip nozzle shape). There’s a fair bit of slack, so it’s easy to unclip it from the 2 mounts that you can see in the vicinity. A bit of fluid will drip out.
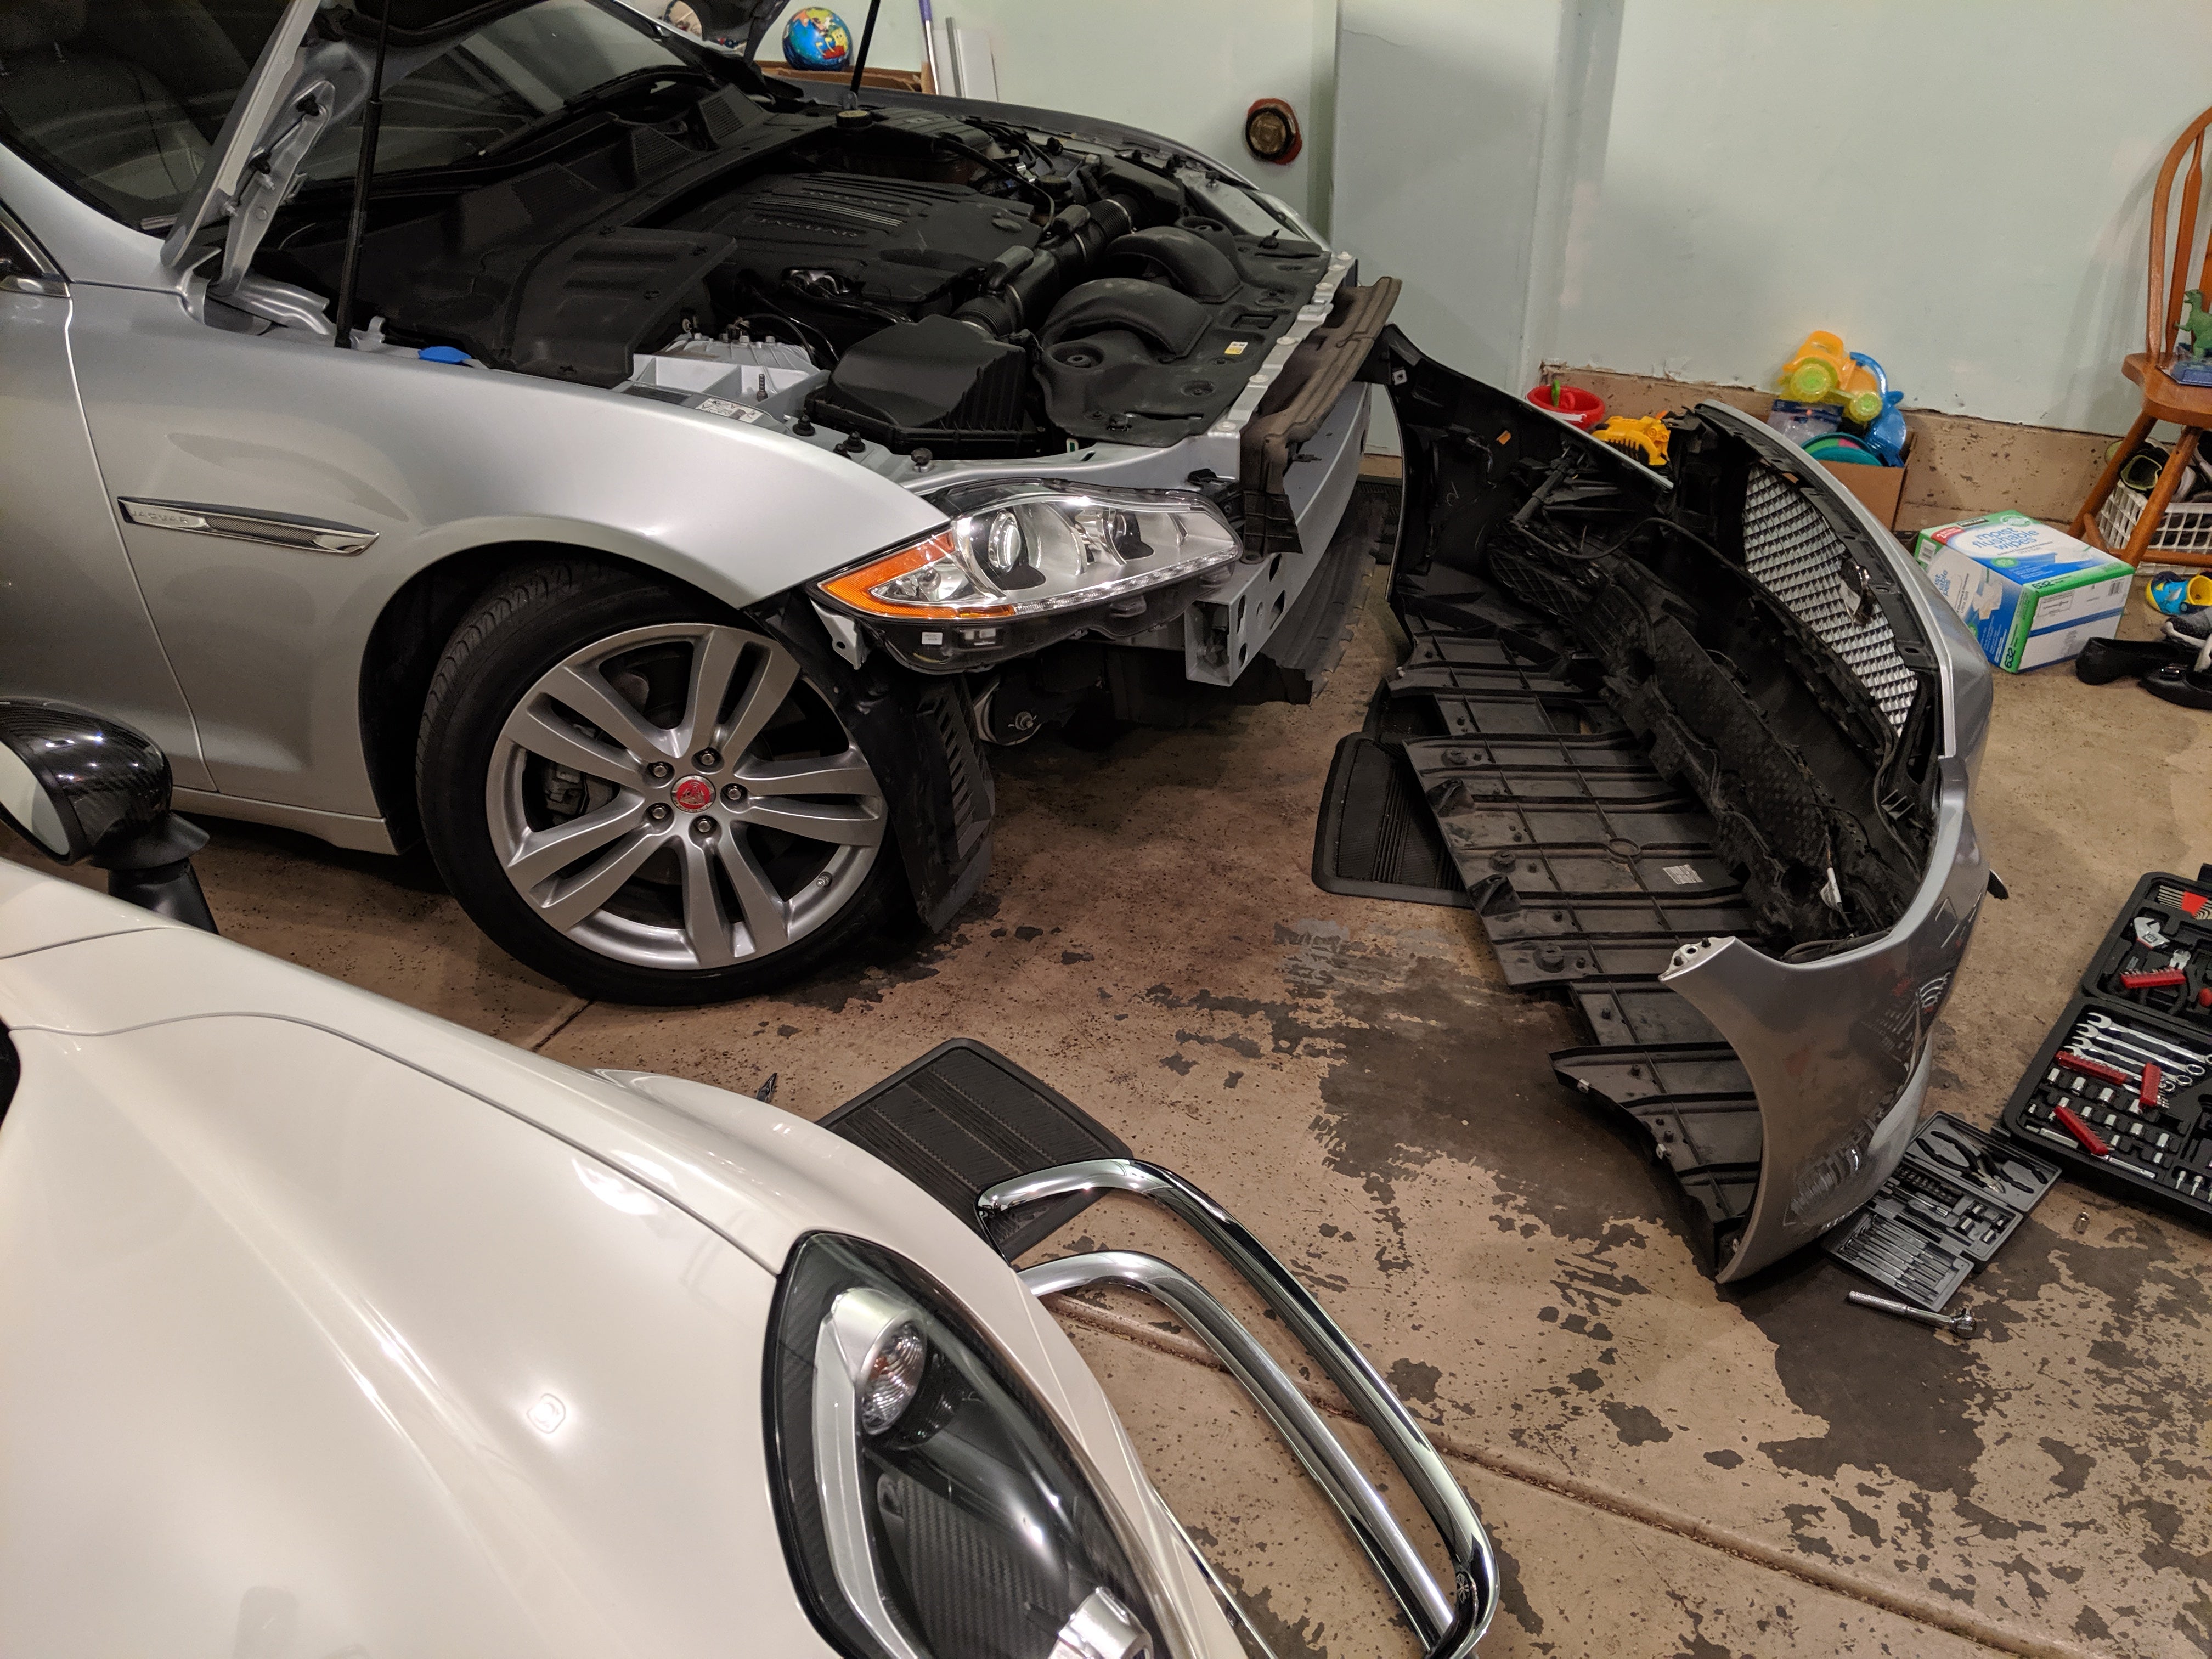
9. Now the bumper should pull off the car completely. One mistake I made was forgetting to towel up the rubber mats for the bumper to rest on. I ended up scuffing the brand new paint job just by working on the grille with the bumper face-down.
10. With the bumper off, I could then change out the grille surround. There are a bunch of smaller (some size less than 7/32 Torx) screws holding the grille. Start with the ones that are visible, about 8 of them.
11. There are many more identical screws hidden behind a big black foam block housing the parking sensor connections and the headlamp washer supply lines. You can see the block and the lines in the photo on Step 6. Unclip all of those lines to prepare for removal of the foam block. Disconnect the two parking sensors hiding in holes within the block. Those lines can now be pushed out of the way.
12. Four of the Torx screws that you had previously removed actually held on some plastic mouldings that are in the way of removing the foam block. Peel them back, one at a time, as far as you can without breaking them, and the foam block can be rotated out and released.
13. Get all the remaining Torx screws out of the grille assembly. The grille itself did not need to be unclipped from the car. With all of its mounting screws out, the chrome surround actually unclips from the “fake mesh” centre and pushes out of the front of the bumper.
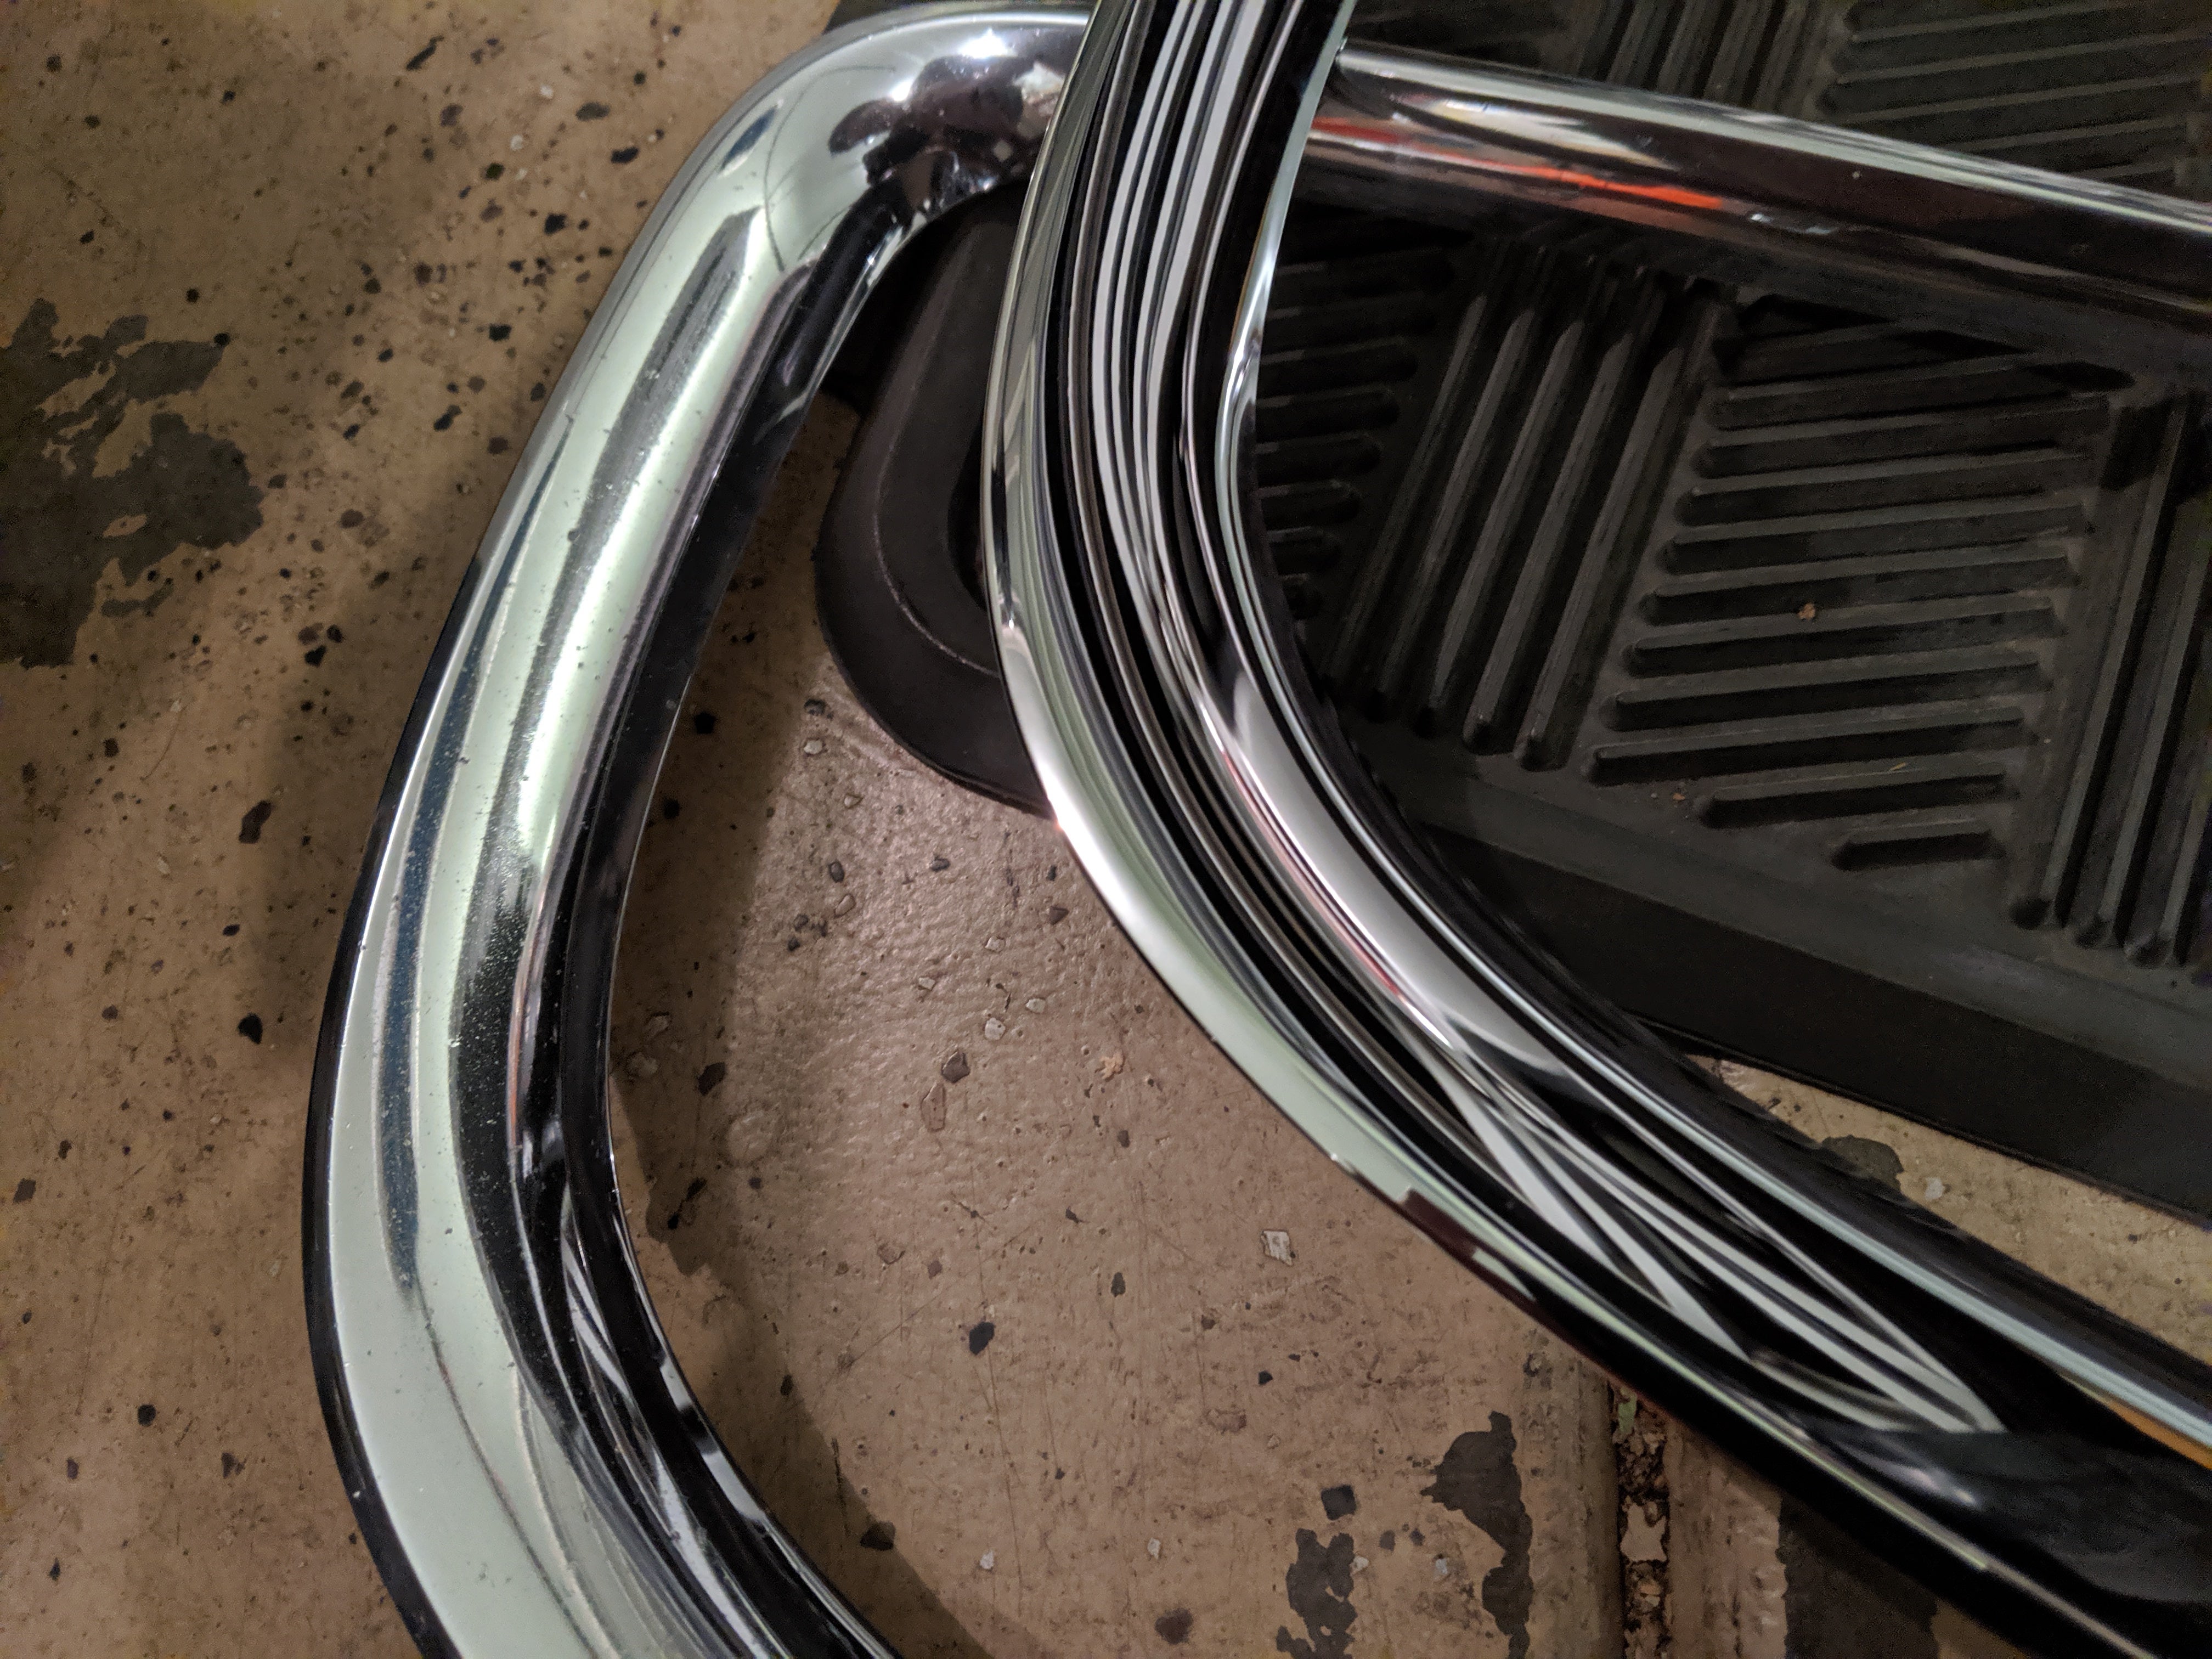
Here is the new chrome grille surround compared to the old:
Now is a good opportunity to dump all of the rocks and other debris (and yes, the cigarette butt) before putting the bumper back on. Best to sweep it all up while your hands are dirty.
Since I now knew where everything was, putting everything back together was much easier. You may be able to get everything back together without turning the front wheels a third time, especially if you are working in daylight. Not so for me at 3 in the morning.
Hope this was at least mildly entertaining...all that work for a piece of chrome trim.
 My X-type is too a real Jaguar
> Chan - Mid-engine with cabin fever
My X-type is too a real Jaguar
> Chan - Mid-engine with cabin fever
06/08/2019 at 22:18 |
|
You forgot to sacrifice a chicken, the 1st step of all jaguar repairs.
 pip bip - choose Corrour
> Chan - Mid-engine with cabin fever
pip bip - choose Corrour
> Chan - Mid-engine with cabin fever
06/09/2019 at 06:59 |
|
we ll done